Discover on this content the features to check your content.
An article or a guide can be categorized in two possible ways:
To be checked
Verified
👉 An article or a guide, when created, will automatically be considered as "To be checked" until the status is manually changed by an admin.
👉 A collection is not considered in this categorization.
Regardless of the content status, it will remain visible for advisors in the knowledge base.
Regardless of the verification status of the content, as long as it is published, it will remain visible for advisors in the knowledge base.
🎯 Use cases
Change the status to "Verified" when it is complete and up-to-date and increase the trust score of your knowledge.
Change the content status back to "To be checked" when it is outdated and you need to update it or ensure its reliability.
Facilitate the update of your content and ensure a permanent follow-up of your knowledge base.
Identify the content that needs updating on a regular basis and apply a personalized verification process based on the content typology.
Ensure the reliability of the information provided by your advisors to customers and a quality processing of requests.
❌ Status "To be checked"

A content to be checked is considered as outdated.
Advisors do not have visibility on the obsolescence of a content.
The objective is therefore to update the content as quickly as possible in order not to penalize the production of advisors.
The notification of an outdated content is visible in two formats:
The "To be checked" status visible below the title of your article/collection;
A red dot is present to the right of the content title in the summary on the left of the admin interface.

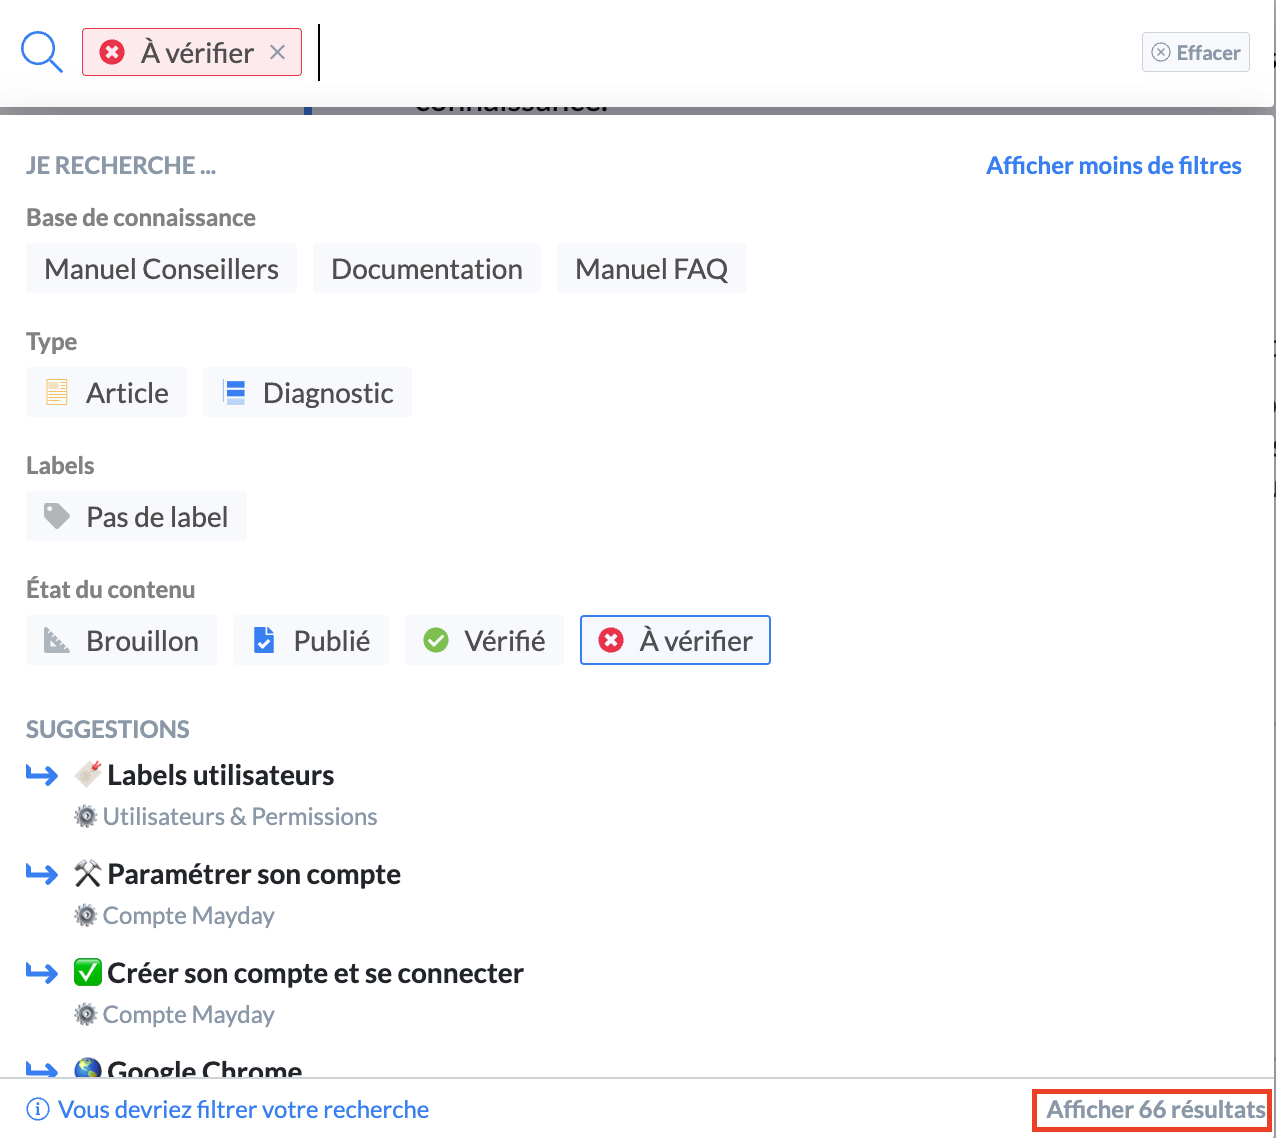
To identify all your contents with the status "To be checked", filter your search engine on the label "To be checked". You will get the list of all concerned contents.
✅ Status "Verified"

A verified content is considered as up-to-date.

🚦 Change the status of your content
To change the status of your content To be checked <> Verified, the process is simple and the same regardless of the direction of the modification:
Click on the term "To be checked" or "Verified" so that the status is changed.
⚙ Automate the life cycle of your content
The main objective is to maintain an up-to-date knowledge base so that your advisors can continuously consult reliable processes for your customers.
The automation of the life cycle of your content is therefore directly linked to the "To be checked" and "Verified" statuses and has a dual functionality:
Limit the obsolescence of your knowledge base;
Limit manual processing to detect content to be modified.
The verification process allows you to periodically check the completeness and accuracy of a content.
The life cycle of knowledge consists in defining an "expiration date" or a verification frequency of a content.
After setting up the parameters, a content that "expires" automatically switches to the "To be checked" status so that an administrator can update it if necessary.
1⃣ Set up a verification process
The setup is done at the level of each content.
Below each content title is the ⚙ icon "Edit the verification settings of this content".

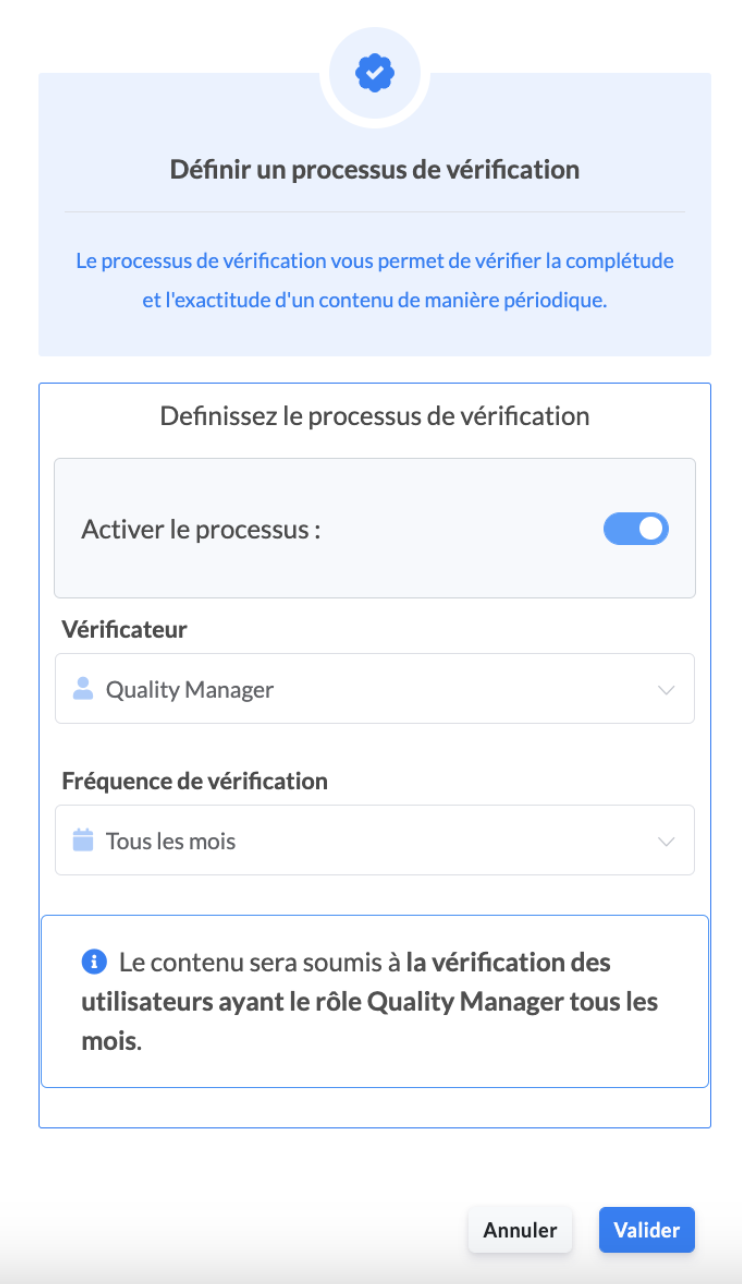
To create a verification process, follow these steps:
Click on the ⚙ icon to open the window;
Activate the verification process;
Define the "Verifier" among the proposed users or roles (roles must have the "Verification" option to be in the list);
Define the "Verification frequency" among the following choices:
Every day;
Every week;
Every month;
Every three months;
Every six months;
Every year;
On a specific date (if you choose this option, you must then select the expiration date of your content).
Activate if you wish the option "Put in draft once expired", to make your content automatically invisible on the advisor side on the date or verification frequency defined;
Click on "Validate"
Your verification process is now activated! 🤩
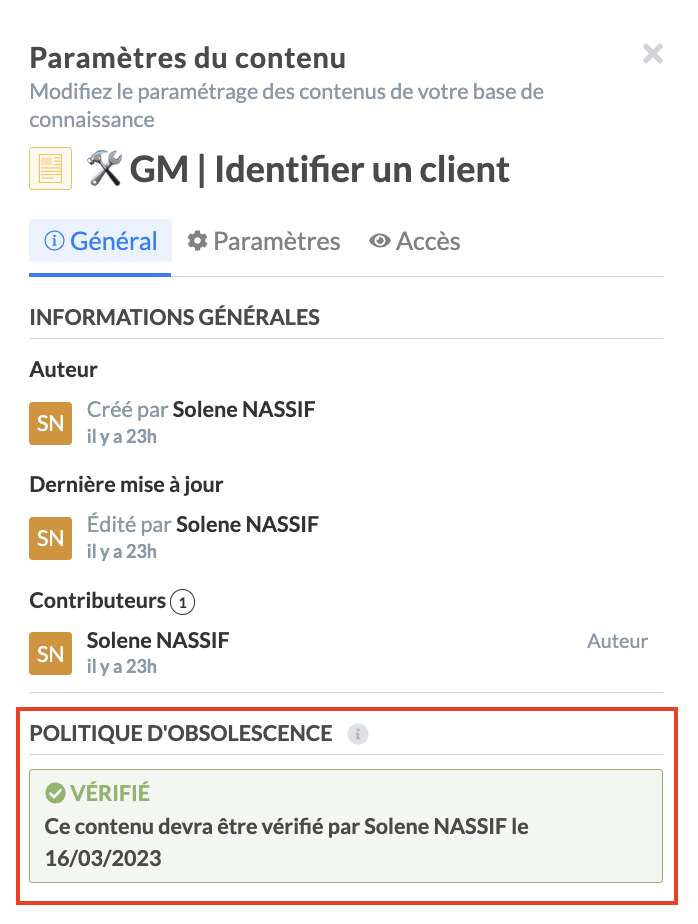

You can at any time modify or delete an automation.
2⃣ Be informed on the verification date
Once the verification date has passed, here is how you will be notified:
Your content automatically switches to the "To be checked" status and to the "Draft" status if you have activated the aforementioned option;
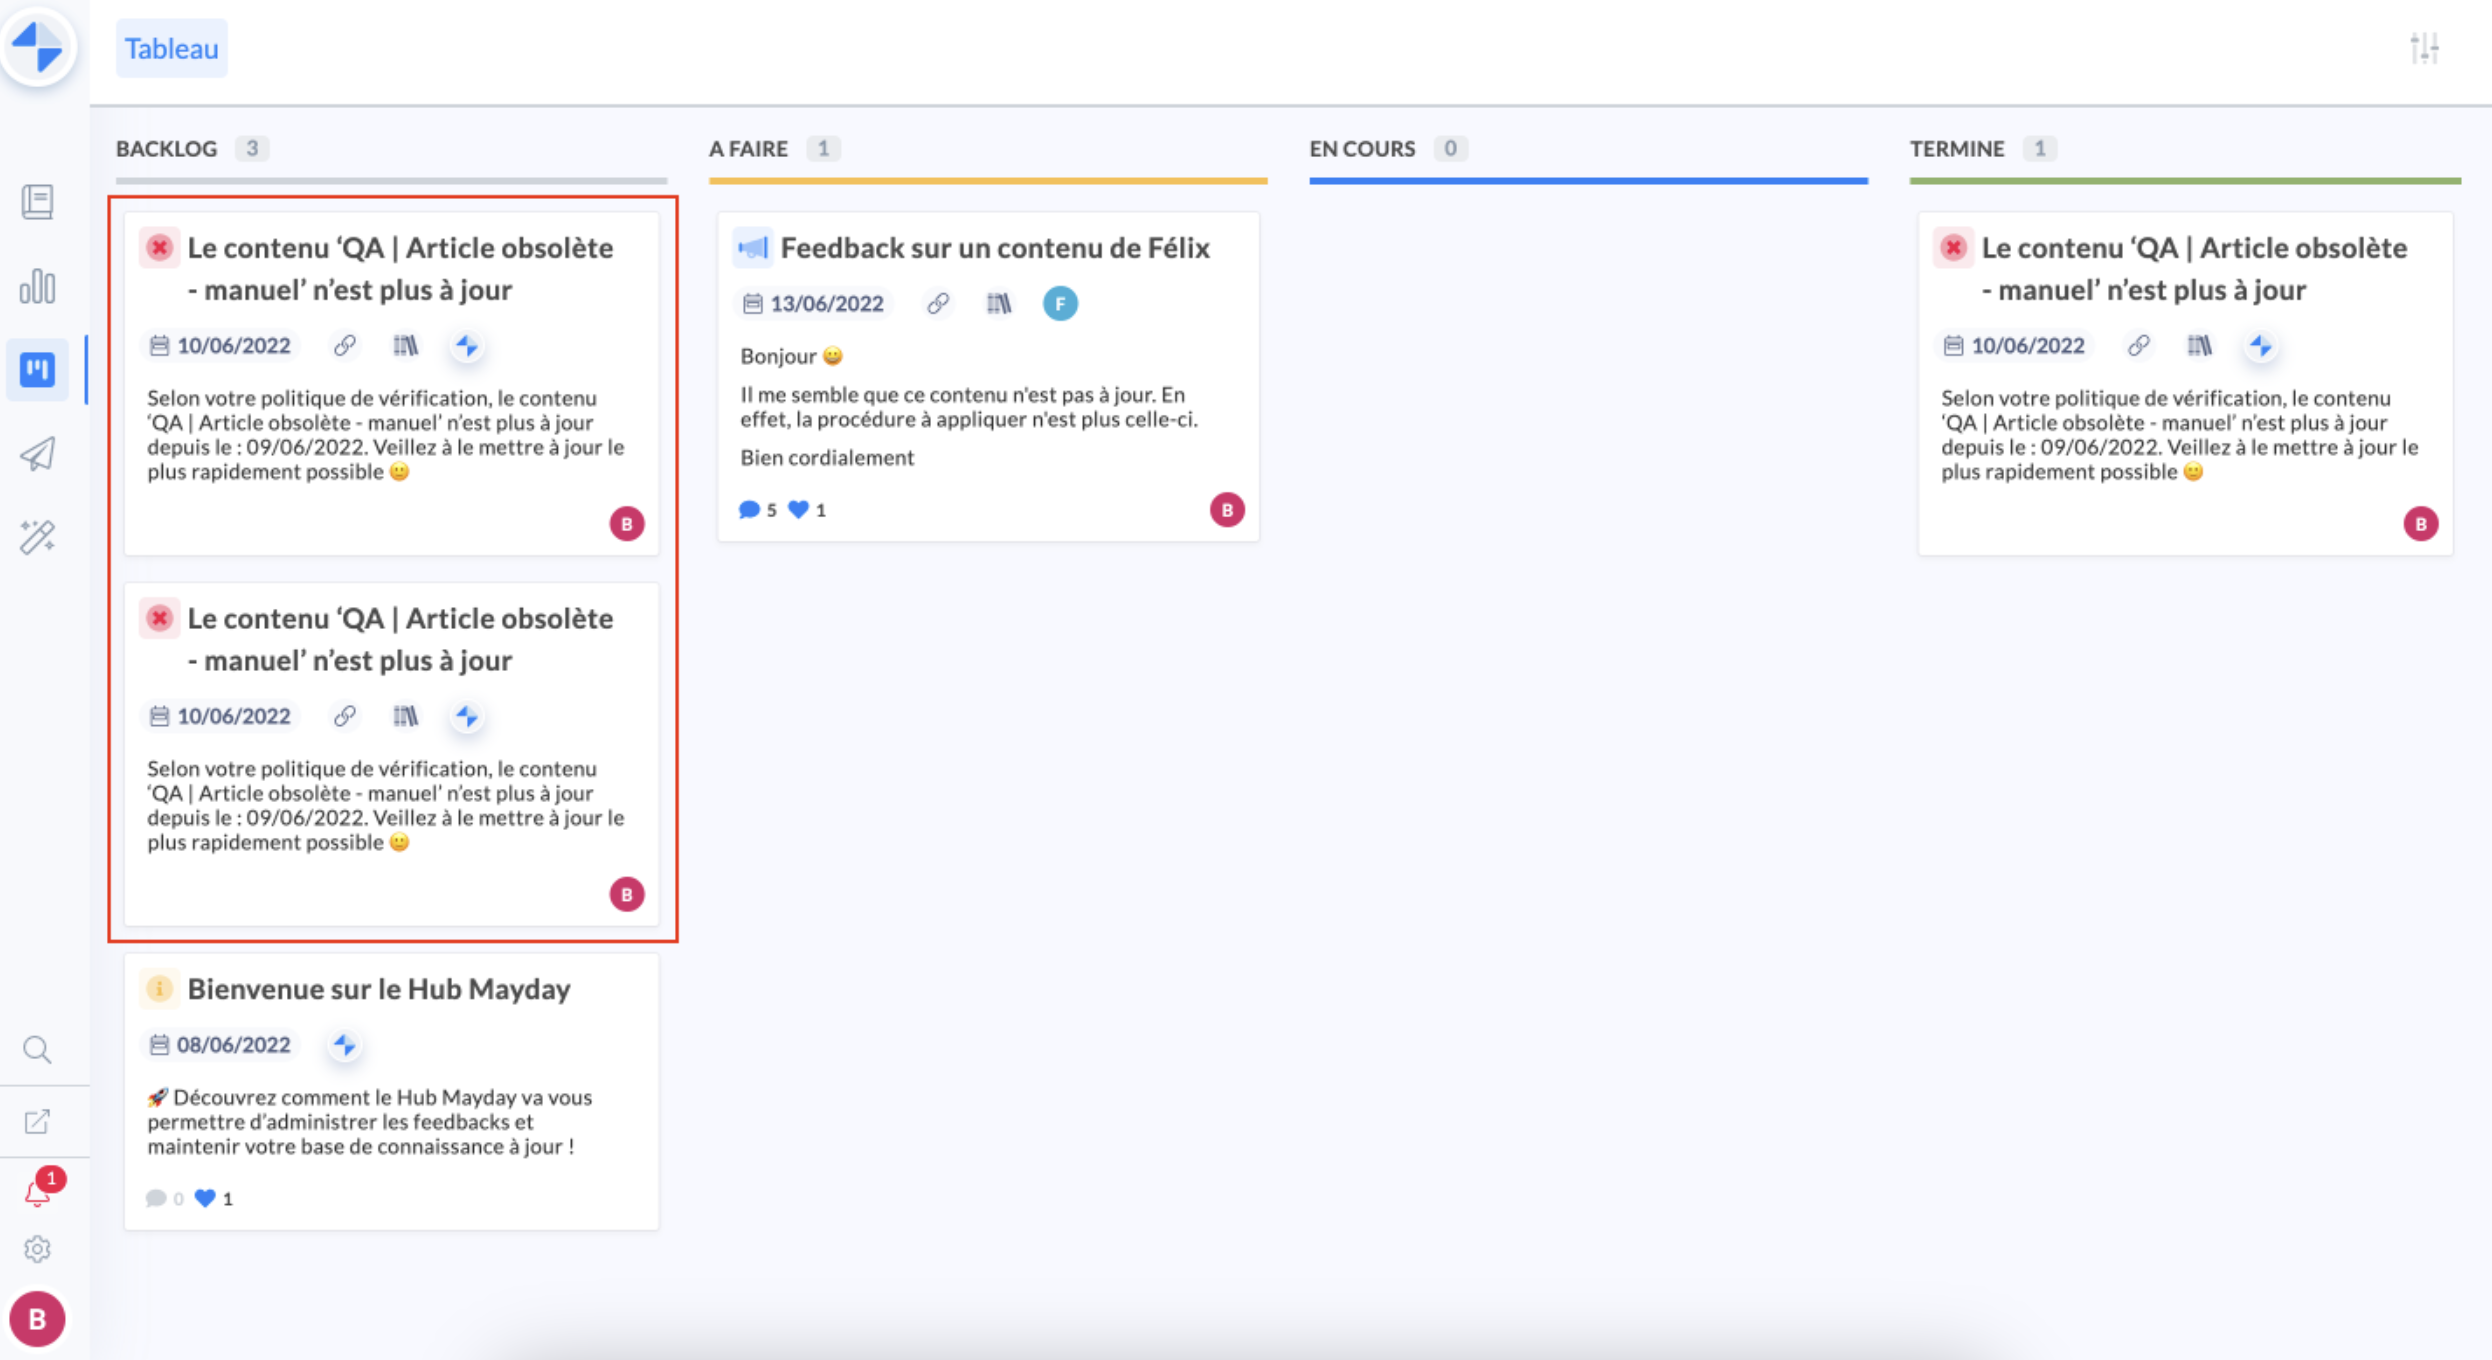
An obsolescence alert is displayed in the form of a new task in the Mayday Hub → see the article 📌 Manage your tasks in the Hub ;
Depending on the settings activated in the notifications of your Mayday account, the verifier is informed that a content needs to be checked:
via a notification received in his Mayday space;
via an email sent at the end of the verification frequency or on the chosen expiration date;
via an email sent every Monday morning listing all "To be checked" contents.
📸 View an example of email 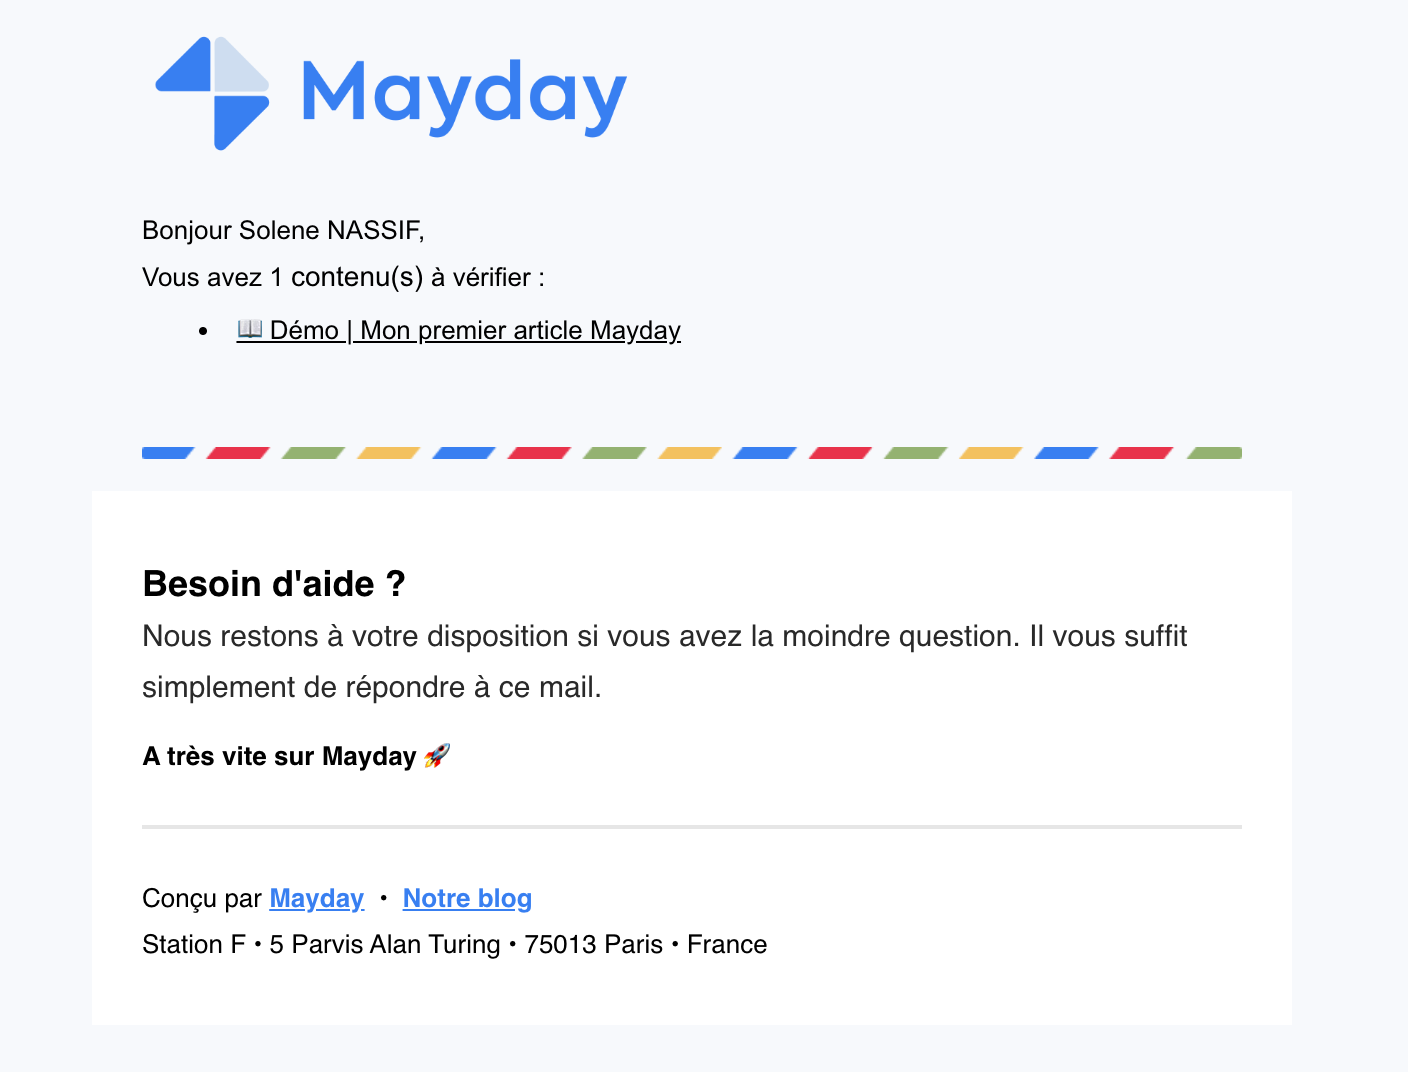
After updating the content, simply switch the status back to "Verified" (and "Published" if the content was in draft status).
If you have set up a verification process at a regular frequency and not on a specific date, the life cycle of a content has no end date. In other words, it is up to you to modify the verification frequency or delete it manually.