📕 Presentation
Discover on this content how to create roles and access to features.
This feature is located in the "Settings" tab of your Mayday account.

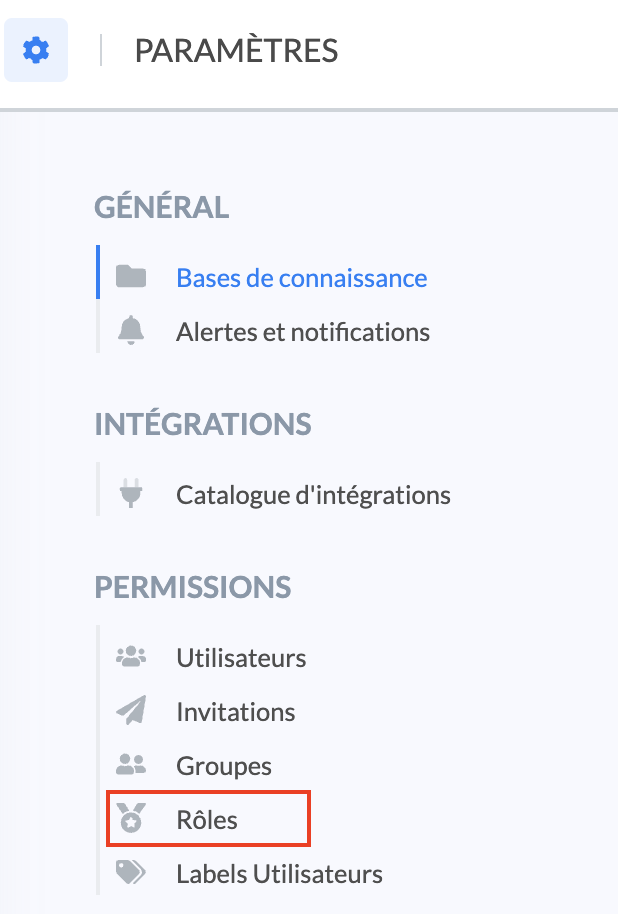
Roles allow you to restrict access to certain Mayday features.
This feature is divided into several steps:
- 📕 Presentation
- 🎯 Use cases
- 🏗 Step 1: Create and name the role
- 🏗Step 2: Define access to features
- 🏗 Step 3: Assign the role to users
- 🏗 Step 4: View the list of members of a role
- 🏗 Step 6 (optional): Perform a grouped action
👉 A role has at least "Read knowledge" access.
👉 A role can have all accesses.
By default, the roles "Agent" and "Owner" are present as a demo:
You can use them to attach them to users but be careful, these roles cannot be modified or deleted.
💡We therefore advise you to create custom roles that can be modified or deleted according to your needs.
The feedback feature is linked to roles. Thus, the created groups will constitute the list of potential recipients during the sending of feedback → consult the article 📣 Deal a feedback in the Hub for more information
🎯 Use cases
Establish a governance strategy to maintain your knowledge base over time!
Create a custom role and configure it to define the actions that collaborators will be able to do in Mayday. Then assign this role to users.
🏗 Step 1: Create and name the role
Follow the following steps:
To create a role, simply click on "
Create a role";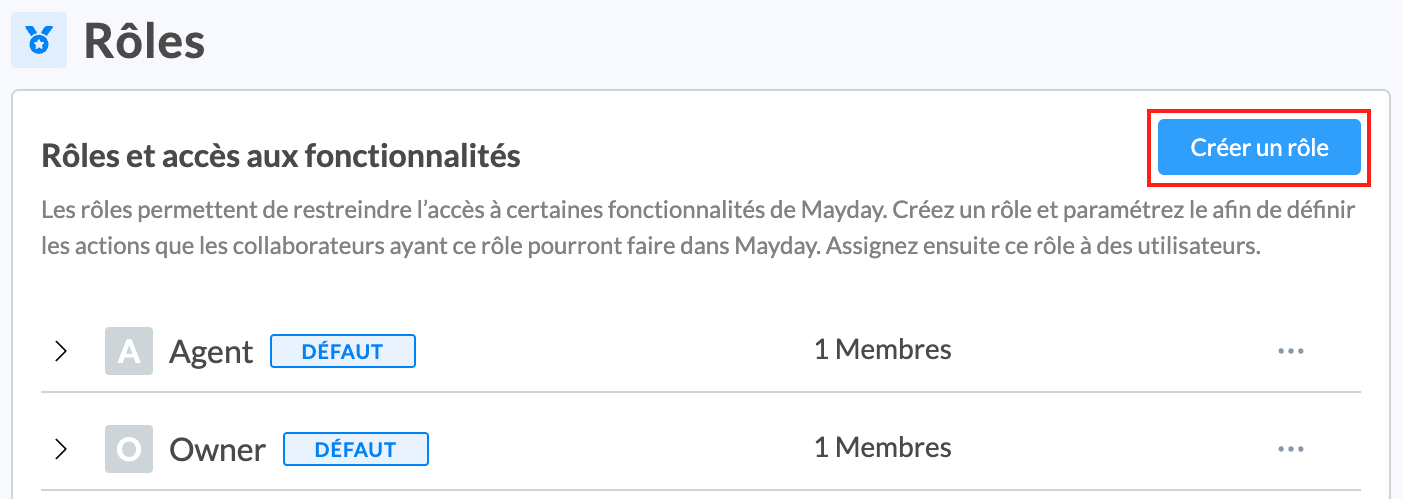
You must then assign a name to this role;
We recommend that you define a short and explicit name, which clearly materializes the function of the members of this role on Mayday.
Example: "Verifier", "Editors", "Managers"...
You will then have access to a settings panel allowing you to define the accesses granted to this role, by functionality;
📸 View the settings panel 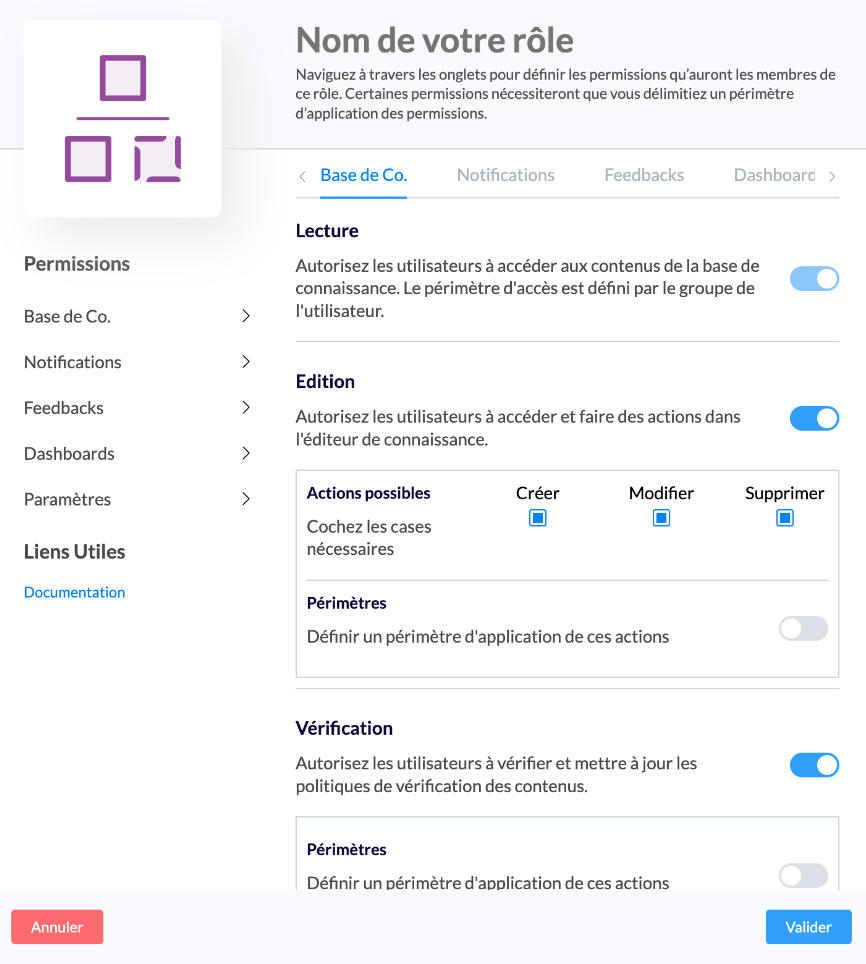
Once the accesses have been selected, you must click on "
Validate";Your role is now created! You can view all of your roles and the defined accesses for each role on the settings page:
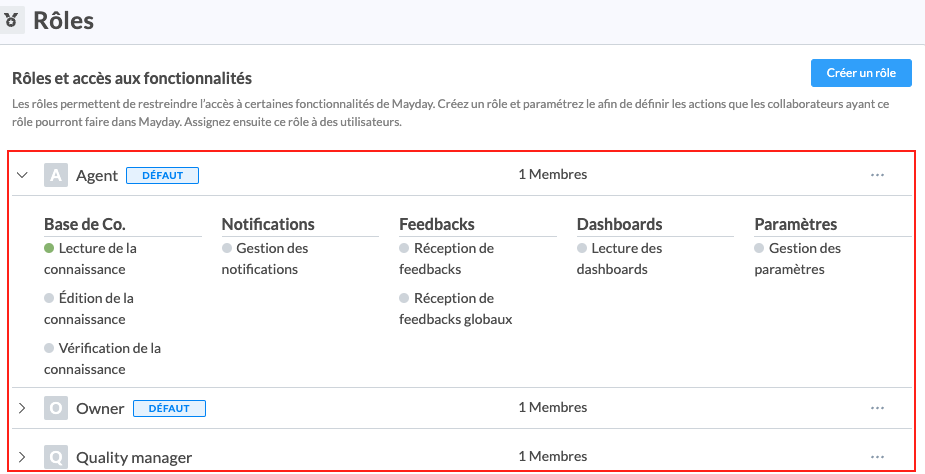
You can modify a role at any time by clicking "..." to the right of the role and then on "Edit the role".
Deleting a role is also possible if no user belongs to this role. Simply click on "Delete the role".

🏗Step 2: Define access to features
You can give your users very granular rights, depending on their responsibilities and your internal processes.
📚 Access "Knowledge Base"
This access determines the scope of action granted on the knowledge base. It is divided into three permissions.
1⃣ Read knowledge
The user will be able to consult the content present in the knowledge base. However, access to content depends on any restrictions potentially applied to the group in which the user is located → see the article 👥 Create groups - access to the contents
2⃣ Edit knowledge
This access gives users the right to access the knowledge base editor in order to be able to edit content.
You can modulate these editing rights in a granular way:
by granting the right to create, modify and/or delete content or only one of these three actions (for example, you can give rights to create content and modify but not delete);
by selecting the knowledge bases on which these actions can take place.
This second option is particularly useful if you are a large number of editors and you want some to be able to edit knowledge base A without being able to edit knowledge base B (for example, in the case of a knowledge base by entity/subsidiary of a group).
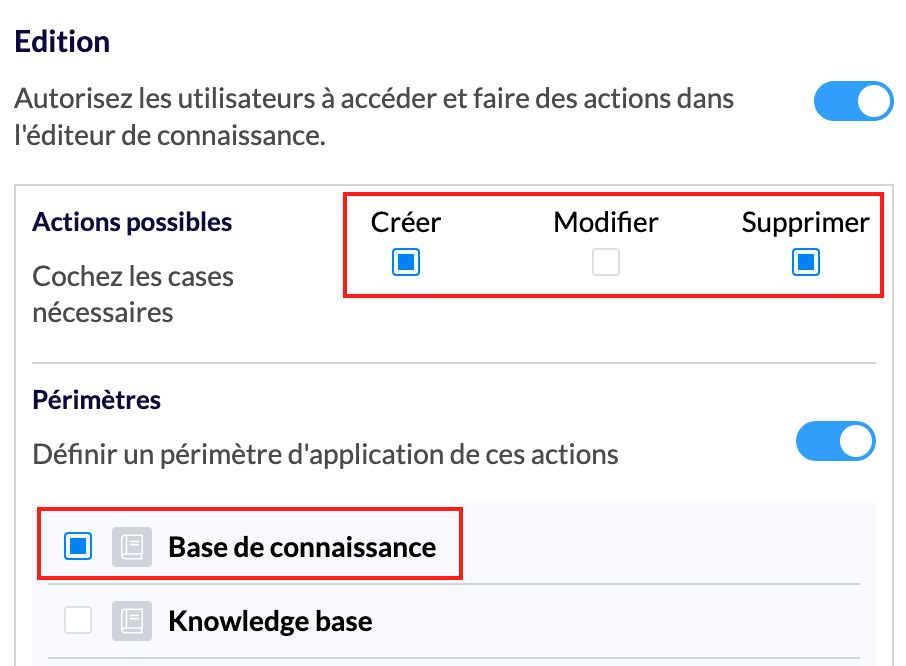
The "Edit knowledge" permission considers the user as an "admin" and automatically gives them access to all content in the knowledge base despite any potential restrictions related to the user's group.
3⃣ Knowledge verification
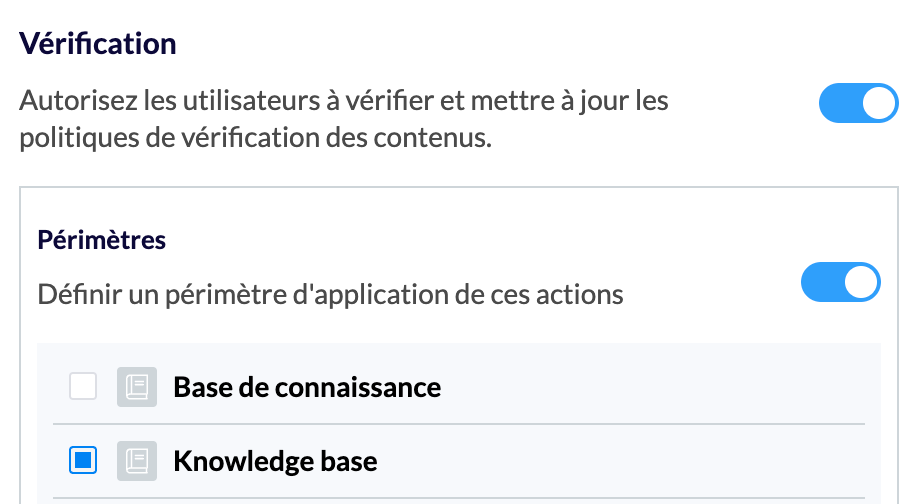
The user will be able to verify and update content verification policies. You can thus grant only the verification permission to certain users without granting them editing permission. The users concerned will then be verification agents only.
It is possible to refine this right by determining the knowledge base(s) on which the verifiers will be able to act.
🔔 Access "Notifications"
The user will be able to manage and send notifications to advisors.
📣 Access "Feedbacks"
The user will be able to receive and processsent by advisors (consult this article if you want more information: 📣 Deal a feedback in the Hub . This access is divided into two permissions.
1⃣ Receiving feedbacks
The user will be in the list of unique recipients who can receive feedback. The advisor will have to choose the unique user to whom to send their feedback. Only the recipient selected by the advisor will have access to the feedback and not the other users with the same role.
Example: you create a "Supervisor" role with this permission active. You assign this role to Henri, Benjamin and Célia. In this case, advisors will be able to directly address feedback to Henri, Benjamin or Célia individually.
2⃣ Receiving global feedbacks
The name of the user who holds this role will not be in the list of recipients proposed to the advisor. The latter will have to choose the role, not a person, to whom to send their feedback. All users who hold this role will receive the advisor's feedback.
Example: you create a "Supervisor" role with this permission active only, without "Receiving feedbacks". You assign this role to Henri, Benjamin and Célia. In this case, advisors will be able to address feedback to Supervisor and this feedback will be received by Henri, Benjamin and Célia.
📊 Access "Dashboards"
The user will be able to consult the dashboard.
⚙ Access "Settings"
The user will be able to access the Setup your account page and all its features.
🏗 Step 3: Assign the role to users
Once the role has been created and the accesses defined, you just need to assign this role to one or more users.
✅ If the users have already been created: go to the 🎛️ Manage users page to edit the role of the users concerned.
⏳If the users have not yet been invited or their invitation has not yet been validated, go to the ✉️ Invite a new user page to edit the role of the users concerned.
It is possible to assign multiple roles to a user. Their restrictions will be the combination of the permissions of the assigned roles.
🏗 Step 4: View the list of members of a role
As soon as a group has at least one user, you can view the list of users present in this group.
Go to the "Users" section;
Click on "Show details";
Filter the user management center on roles and select the desired role;
You can perform a grouped action on all the users that are displayed.
👉 Consult the article 🎛️ Manage users for more information.
🏗 Step 6 (optional): Perform a grouped action
You can perform a grouped action on a set of users with the same role by going to the "Users" subsection.
👉 Consult the article 🎛️ Manage users for more information.