📕 Presentation
Discover on this content how to create user groups and define access perimeters by group.
This feature is located in the " Settings" tab of your Mayday account.

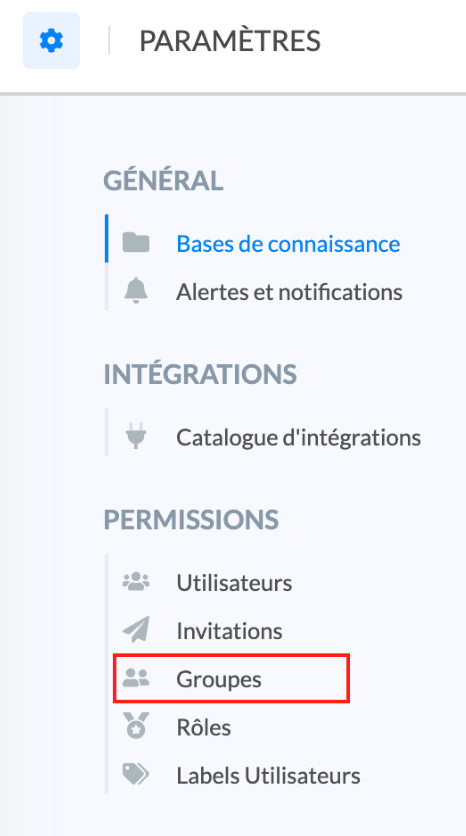
Groups allow you to restrict access to certain Mayday collections.
Access restrictions can be made at the collection and sub-collection level, but not at lower levels (sub-sub collection, article/diagnostic).
Each group can be modified or deleted whenever you want.
A user cannot belong to multiple groups at the same time.
This feature is divided into seven steps:
- 📕 Presentation
- 🎯 Use case
- 🏗 Step 1: Create and name the group
- 🏗 Step 2: Define access restrictions
- 🏗 Step 3: Check the settings
- 🏗 Step 4: Assign the group to users
- 🏗 Step 5: Consult the list of members of a group
- 🏗 Step 6: Search for a group
- 🏗 Step 7 (optional): Perform a group action
The notification feature is linked to groups. Thus, the created groups will constitute the list of potential recipients during the sending of a notification → see the article 🔔 Send a notification to the users for more information
🎯 Use case
Distribute users within different groups according to their positions and the access rights you want to assign them.
Send notifications to one or more groups according to the users concerned by the news.
🏗 Step 1: Create and name the group
To create a group and define access rights, follow these steps:
Click on the "
Settings" tab;Click on the "
Groups" subsection;Click on "
Create a group".
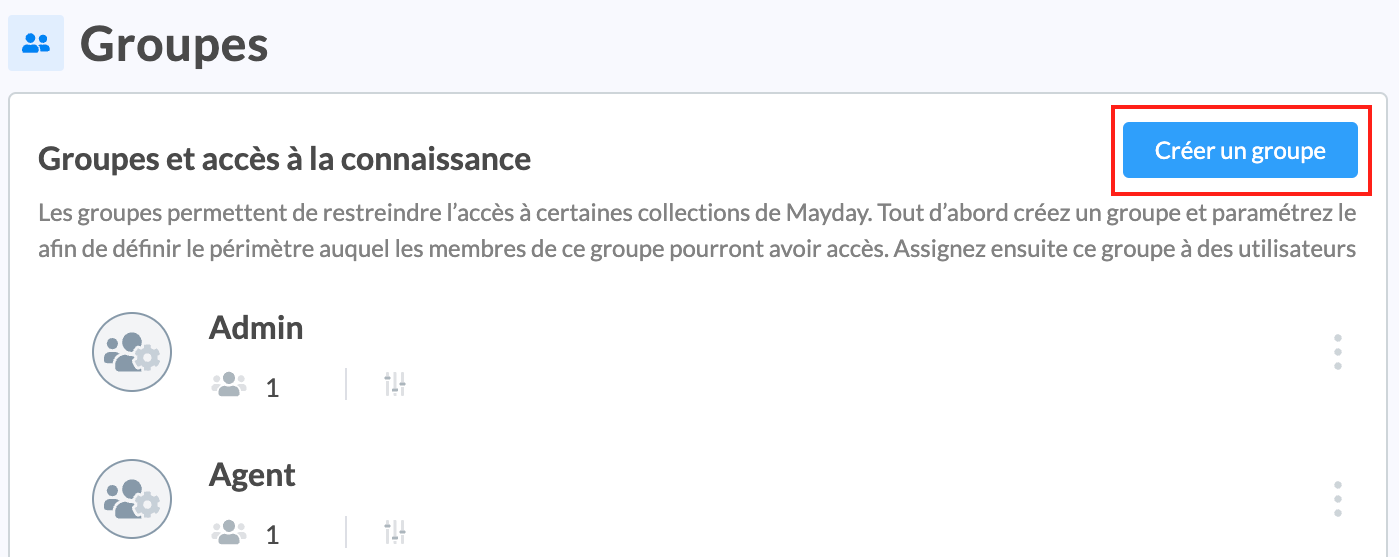
A modal opens to invite you to name the group.
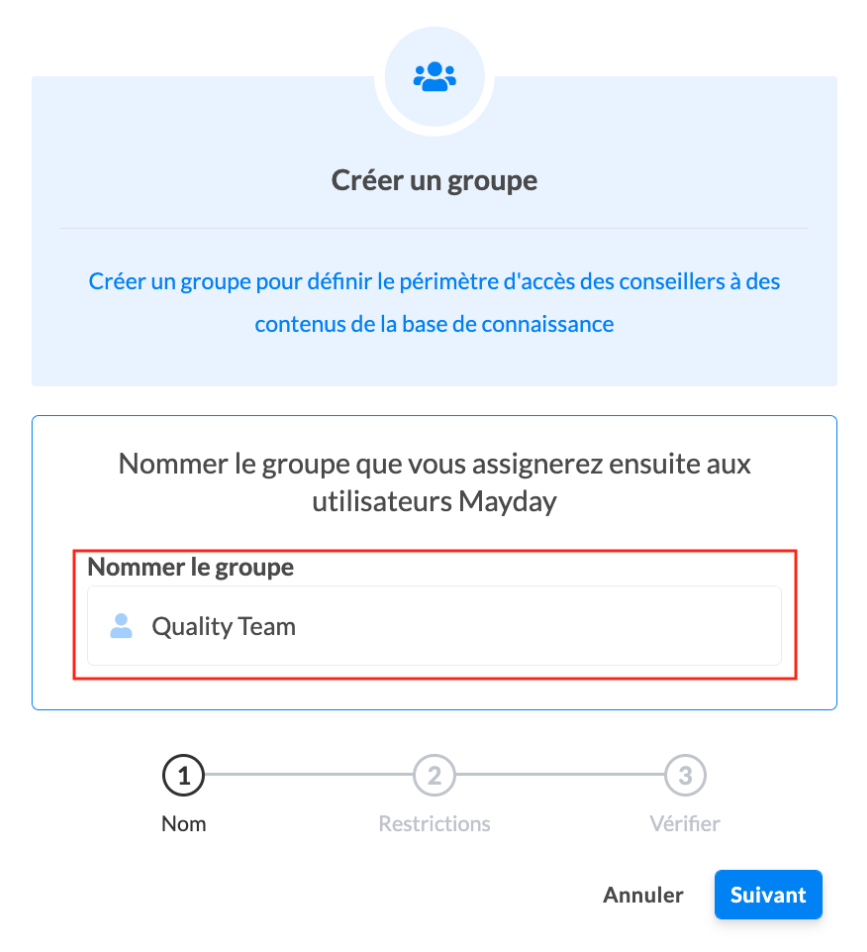
💡 Some recommendations for naming your group :
- Explicit name on the function of this group (ex: Quality & Process Team);
- Indicate the initials of the country to differentiate from multilingual groups (ex: FR Advisors).
🏗 Step 2: Define access restrictions
Access restrictions take place in two steps:
1⃣ Select the knowledge base(s)
In the event that you have multiple knowledge bases, select the one(s) you want to make accessible to this group.
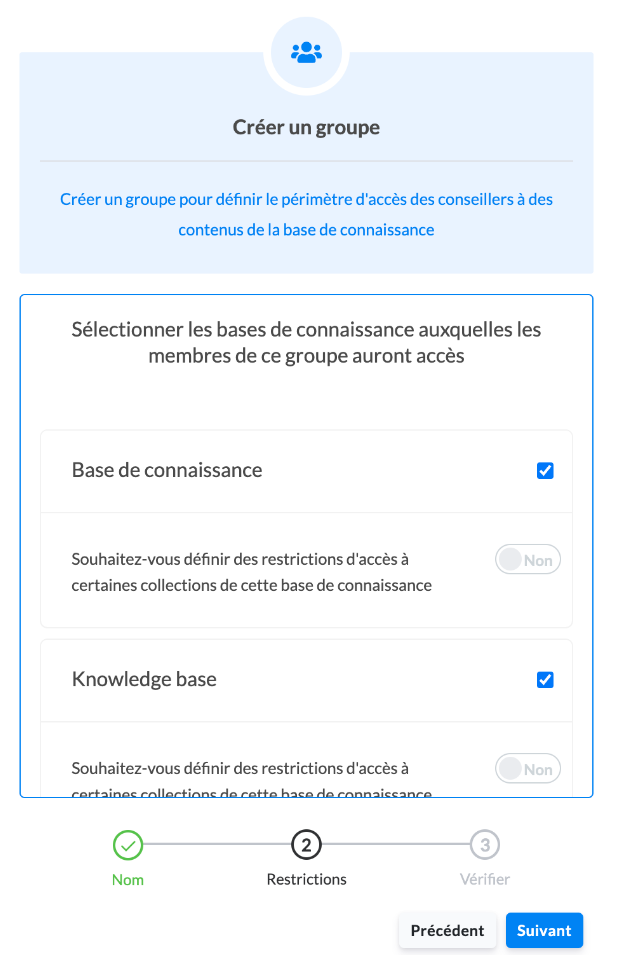
2⃣ Define access restrictions
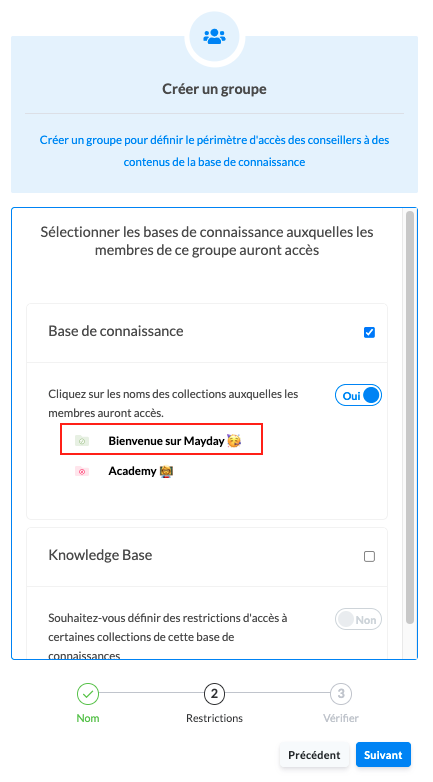
You must then, on the scale of each selected knowledge base, define whether you want to activate access restrictions to certain collections and/or sub-collections.
By default, there are no access restrictions. The group therefore has access to the entire knowledge base.
To restrict access to a collection/sub-collection:
Activate the option "
Do you want to define access restrictions to certain collections of this knowledge base?";At this point, we apply a total restriction so that you can customize access.
Click on the title of the collection(s) to confirm access;
As soon as an access is validated, the icon of the collection will be green.
🏗 Step 3: Check the settings
At this stage, you can click on:
"
Cancel" to completely stop creating the group;"
Previous" to modify a parameter;"
Validate" to confirm the creation of the group.
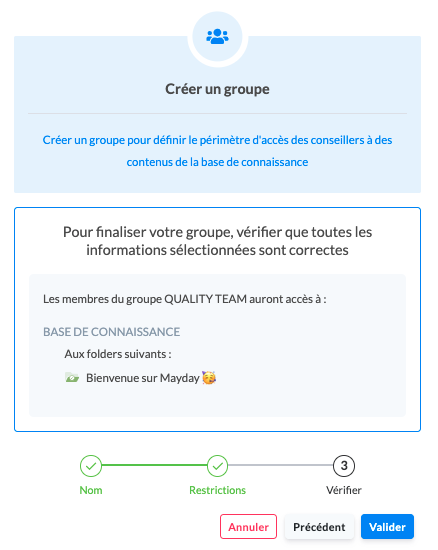
You can, at any time, delete the group or modify the restrictions.

🏗 Step 4: Assign the group to users
To assign labels to users, it is necessary to distinguish the following two cases:
✅ If users have already been created: go to the article 🎛️ Manage users to edit the group of the users concerned.
⏳If users have not yet been invited or their invitation has not yet been validated, go to the article ✉️ Invite a new user to assign the group to future users concerned.
🏗 Step 5: Consult the list of members of a group
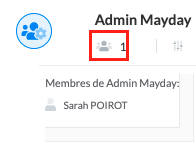
As soon as a group has at least one user, you can consult the list of users present in this group.
Place your cursor on the icon 👥 ;
Expand the list to view all members of the group.
🏗 Step 6: Search for a group
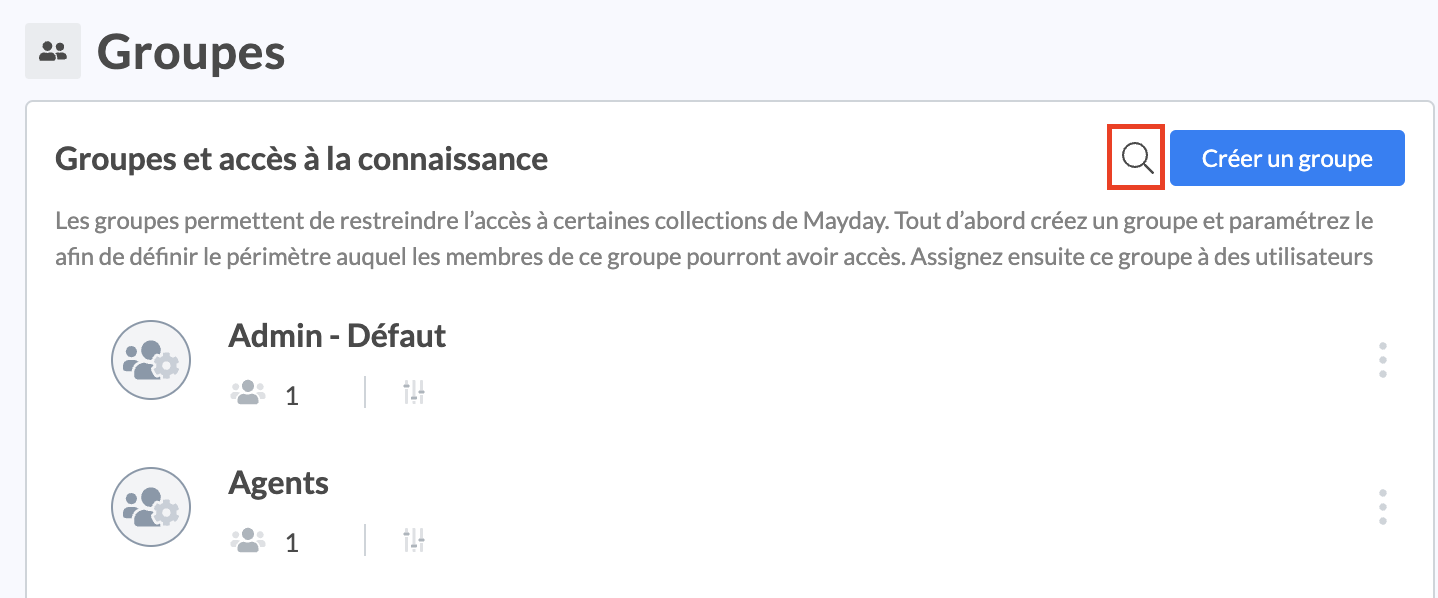
You can search for a group using the search bar at the top right of the section.
🏗 Step 7 (optional): Perform a group action
You can perform a group action on a set of users from the same group, by going to the " Users" subsection.
👉 See the article 🎛️ Manage users for more information.